This article is based on the following software
Cisco ASAv Software Version 9.12(2)9
Firepower Extensible Operating System Version 2.6(1.152)
ASDM Version 7.12(2)
Microsoft Windows Server 2016 with NPS as radius server
You may have had an occasion where a user wanted access to an ASA firewall. You are hesitant to grant access, because you don’t want anything broken.
Or, perhaps you have operations staff who need to do basic troubleshooting. But as before, you don’t want too many people having full access.
You may have tried tacking this problem by using radius and assigning an IETF attribute on Microsoft Network Policy Server (NPS)
shell:priv-lvl=X
(X being the privilege level)
This will NOT work. Ignore all other articles online because the ASA does not understand this attribute and uses service-type attributes in a different way to traditional IOS
IETF Attributes Versus VSAs
RADIUS Internet Engineering Task Force (IETF) attributes are the original set of 255 standard attributes that are used to communicate AAA information between a client and a server. The IETF attributes are standard and the attribute data is predefined. All clients and servers that exchange AAA information using IETF attributes must agree on attribute data such as the exact meaning of the attributes and the general bounds of the values for each attribute.
RADIUS vendor-specific attributes (VSAs) are derived from a vendor-specific IETF attribute (attribute 26). Attribute 26 allows a vendor to create an additional 255 attributes; that is, a vendor can create an attribute that does not match the data of any IETF attribute and encapsulate it behind attribute 26. The newly created attribute is accepted if the user accepts attribute 26.
Or, you may have tried tackling this problem using privilege levels like this:
username caia password Cr@ck3RaCker privilege 5
If you’ve done this, you may have found that levels 0 and 1 grant very restricted access. But all other levels grant full access. This is where Command Policies come in.
You have to define the policies yourself. Once you’ve done that, you can grant limited access to the ASA. In the previous example, you could grant read-only access to a policy.
We’re going to have a look at how to create command policies, and apply them with RADIUS. This applies to the traditional ASA image, not Threat Defence.
Command Policies
Command Authorization is assigning commands to different privilege levels. There are two ways you can do this:
- Local Privilege Levels, where everything is configured on each ASA
- TACACS+, where configuration takes place on a central TACACS server
Notice there is NO radius options, we must use local privilege levels if not using TACACS
We use the privilege command to configure a command policy, as shown below.
privilege show level 8 command running-config
The level is the privilege level that’s required to run the command. Here we require the user to have level 8 or greater to run the command.
We can assign level 3-4 or from level 6–14 (1, 2, 5 and 15 should be avoided as they are already preset by the ASA for other built-in/default privileges)
ASDM recognizes 3 types of user priv, 2, 5 and 15 (monitor, read-only, admin respectively).
Each command has a variant. These are show, clear, and cmd. In the example, we allow show running-config, but not clear or cmd. cmd refers to commands that change the configuration. If you don’t specify anything, the ASA will allow all three variants.
Some commands behave differently in exec (user or privileged) and configuration mode. The mode command optionally specifies which mode the privilege applies to.
The example below contains the commands needed to view routing table and eigrp configuration and statistics. Ignore it for the rest of this article
privilege show level 8 mode exec command ip
privilege show level 8 mode exec command route
privilege show level 8 mode exec command eigrp
The config snip below contains the commands needed to get either read-only or monitor-only ASDM access.
Example
privilege clear level 8 mode exec command aaa-server
privilege clear level 8 mode exec command arp
privilege clear level 8 mode exec command crypto
privilege clear level 8 mode exec command dns-hosts
privilege clear level 8 mode exec command logging
privilege clear level 8 mode configure command aaa-server
privilege clear level 8 mode configure command arp
privilege clear level 8 mode configure command crypto
privilege clear level 8 mode configure command logging
privilege cmd level 8 mode exec command failover
privilege cmd level 8 mode exec command logging
privilege cmd level 8 mode exec command perfmon
privilege cmd level 8 mode exec command ping
privilege cmd level 8 mode exec command who
privilege cmd level 8 mode configure command failover
privilege show level 8 mode configure command aaa
privilege show level 8 mode configure command aaa-server
privilege show level 8 mode configure command access-list
privilege show level 8 mode configure command arp
privilege show level 8 mode configure command asdm
privilege show level 8 mode configure command clock
privilege show level 8 mode configure command crypto
privilege show level 8 mode configure command dhcpd
privilege show level 8 mode configure command failover
privilege show level 8 mode configure command interface
privilege show level 8 mode configure command ip
privilege show level 8 mode configure command logging
privilege show level 8 mode configure command privilege
privilege show level 8 mode configure command route
privilege show level 8 mode configure command ssh
privilege show level 8 mode exec command aaa
privilege show level 8 mode exec command aaa-server
privilege show level 8 mode exec command access-list
privilege show level 8 mode exec command arp
privilege show level 8 mode exec command asdm
privilege show level 8 mode exec command asp
privilege show level 8 mode exec command blocks
privilege show level 8 mode exec command clock
privilege show level 8 mode exec command compression
privilege show level 8 mode exec command cpu
privilege show level 8 mode exec command crypto
privilege show level 8 mode exec command dhcpd
privilege show level 8 mode exec command dns-hosts
privilege show level 8 mode exec command eigrp
privilege show level 8 mode exec command failover
privilege show level 8 mode exec command firewall
privilege show level 8 mode exec command import
privilege show level 8 mode exec command interface
privilege show level 8 mode exec command ip
privilege show level 8 mode exec command ipv6
privilege show level 8 mode exec command logging
privilege show level 8 mode exec command mode
privilege show level 8 mode exec command module
privilege show level 8 mode exec command ospf
privilege show level 8 mode exec command reload
privilege show level 8 mode exec command route
privilege show level 8 mode exec command running-config
privilege show level 8 mode exec command ssh
privilege show level 8 mode exec command uauth
privilege show level 8 mode exec command vlan
privilege show level 8 mode exec command vpn
privilege show level 8 mode exec command vpn-sessiondb
privilege show level 8 mode exec command vpnclient
privilege show level 8 mode exec command wccp
privilege show level 8 mode exec command webvpnNote:
The privilege levels above give read-only access. Remove these following privilege levels from this list to get monitor-only
privilege show level 8 mode exec command import
privilege show level 8 mode exec command running-config
privilege show level 8 mode configure command asdm
privilege show level 8 mode configure command privilege
As mentioned earlier, we are using radius and not tacacs, we must use local authorization
! Enable local privilege levels
aaa authorization command LOCAL
The “auto-enable” at the end of the command below is optional, it allows you to automatically login to the console without entering the enable command.
! Enable authentication for external logins
aaa authorization exec authentication-server auto-enable
On the RADIUS server, be sure to use the following settings:
- Service-Type: Administrative
- Vendor-ID: 3076
- Attribute-ID: 220
- Value: The privilege-level you want to assign
Configuring NPS
We’ll have a look at using Microsoft’s NPS, as it’s a common RADIUS solution.
I’m going to assume that you already have NPS installed and basically set up. This also assumes that you have a RADIUS policy already configured. We’re just going to add command authorization functions here.
Create a new network policy, in our example it will be called “Priv 08 – Read-Only”
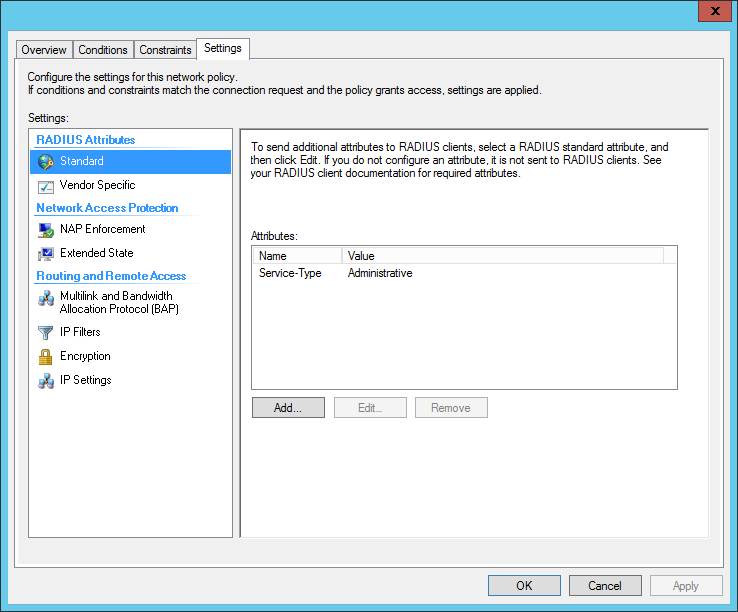
Under Vendor Specific RADIUS attributes, add a Vendor Specific Attribute.
- Set the Vendor to Custom
- From the attributes list, select the Vendor-Specific attribute
- When done, it should appear as figure below:
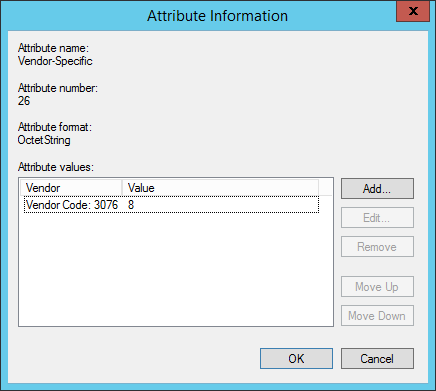
- Add an Attribute Value
- Select Enter Vendor Code, and use 3076 as the Vendor ID
- Select Yes it conforms
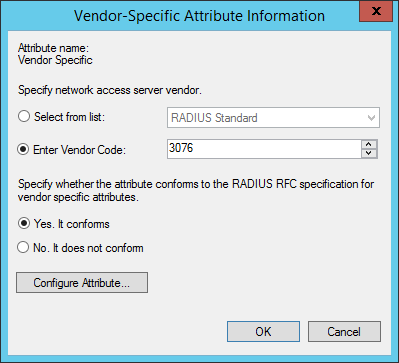
Click the Configure Attribute button.
- Set the Vendor-Assigned Attribute Number to 220
- Set the Attribute format to Decimal
- Set the Attribute Value to the privilege-level (In our example we are using 8)
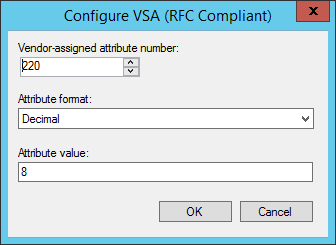
Completed below:
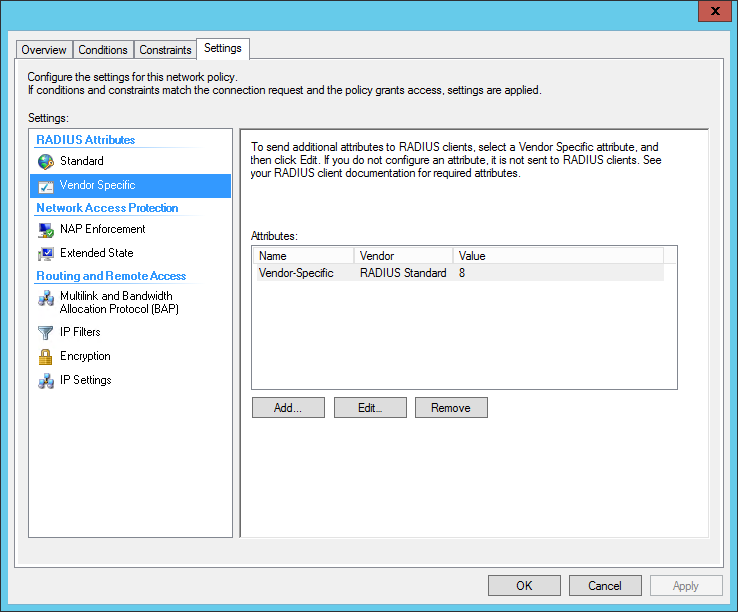
Image shows new policy called “Priv 08 – Read-Only” alongside the existing Priv 15, full administrative policy.
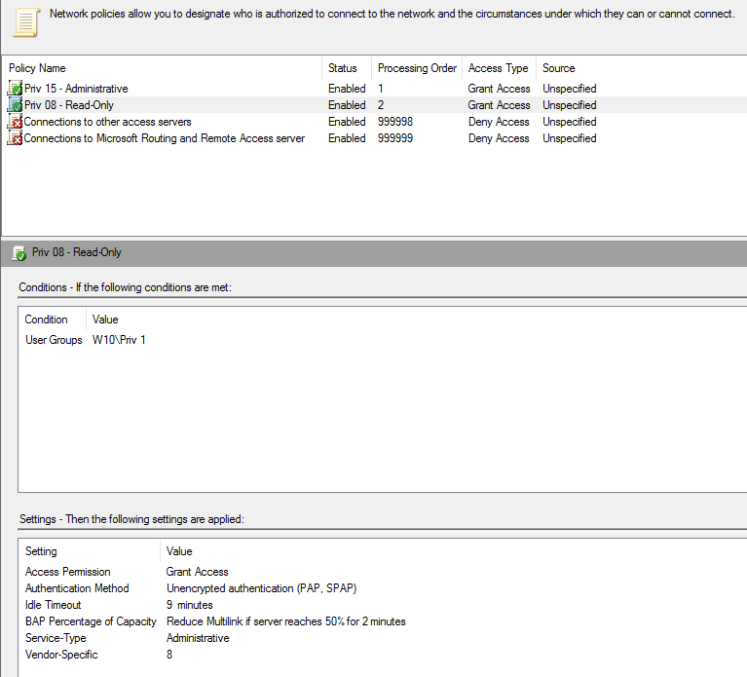
That’s it.
